
Table of Contents
Rainy Saturday, restless kids, and a pantry full of possibility: that’s really all it takes to get started. A good science experiment for kids doesn’t need a lab coat or a chemistry degree, just curiosity and a willingness to let things get a little messy. Below are hands-on projects that turn ordinary household items into genuine “whoa, how did that happen” moments.
Kitchen Chemistry Experiments
These fun science experiments for kids rely on ingredients already sitting in most cupboards. Chemical reactions are especially satisfying for young scientists because the results are immediate.
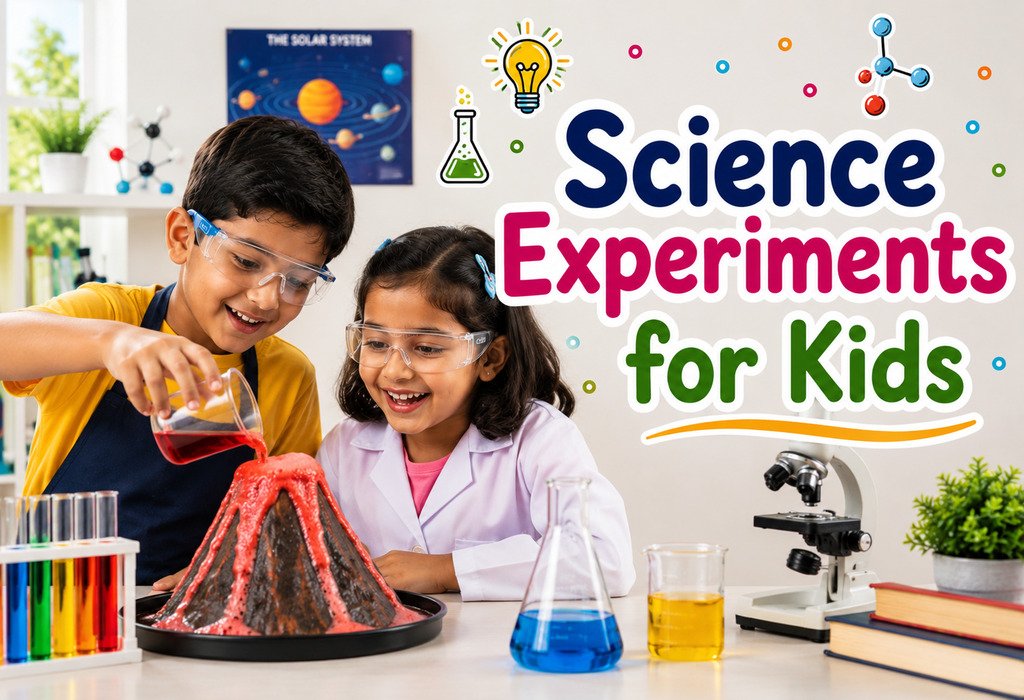
1. Baking Soda and Vinegar Volcano
This is the one most kids try first: fast, loud in a good way, and endlessly repeatable.
You’ll need: baking soda, vinegar, dish soap, red food coloring, a small container or clay volcano
Steps:
- Place the container in a tray to catch overflow.
- Add baking soda, a squirt of dish soap, and a few drops of food coloring.
- Pour in vinegar and watch it erupt.
Why it works: Baking soda is a base and vinegar is an acid. Combined, they produce carbon dioxide gas that builds pressure until it bubbles out as foam.
2. Milk and Food Coloring Fireworks
Younger kids especially love this one because the colors seem to move on their own.
You’ll need: whole milk, food coloring, dish soap, a shallow dish, cotton swabs
Steps:
- Pour milk into the dish to cover the bottom.
- Add several drops of food coloring.
- Dip a cotton swab in dish soap and touch it to the center.
Why it works: Soap breaks the milk’s surface tension and fat molecules, sending the colors swirling.
3. Homemade Slime
Slime has become a staple among science experiments for kids at home, partly for its irresistible “ick factor.”
You’ll need: white school glue, liquid starch or contact lens solution, baking soda, water, food coloring
Steps:
- Mix glue with water and food coloring in a bowl.
- Stir in a bit of baking soda.
- Slowly add liquid starch, stirring until it pulls away from the sides and turns stretchy.
Why it works: The starch links the glue’s polymer molecules together, creating a substance that behaves like both a liquid and a solid.
4. Invisible Ink
This diy science experiments for kids project doubles as a secret-message game that keeps older kids engaged.
You’ll need: lemon juice, a cotton swab or small paintbrush, white paper, a lamp or iron
Steps:
- Dip the swab in lemon juice and write a message on the paper.
- Let it dry until the writing disappears.
- Hold the paper near a warm bulb, or have an adult apply an iron, until the message appears in brown.
Why it works: Lemon juice weakens the paper’s fibers, which oxidize and brown faster than the rest of the page when heated, revealing the message.
5. Fizzing Rainbow Ice
Combine chemistry with sensory play by freezing colored water into cubes and setting them loose with vinegar.
You’ll need: water, food coloring, ice cube trays, baking soda, vinegar, a dropper
Steps:
- Freeze colored water into cubes overnight.
- Sprinkle baking soda over the cubes.
- Let kids drip vinegar on with a dropper and watch them fizz.
Why it works: The same acid-base reaction as the volcano, slowed by the cold so kids can watch the bubbling longer.
Physics and Motion Experiments
These projects show cause and effect in real time, making them quick and easy science experiments for kids that also introduce forces like gravity, air pressure, and friction.
6. Balloon-Powered Car
A simple build that teaches Newton’s third law without mentioning it.
You’ll need: a small cardboard box or bottle, four bottle caps, two straws, wooden skewers, a balloon, tape
Steps:
- Attach straws to the bottom of the box as axles and thread skewers through them with bottle caps as wheels.
- Tape a balloon to a straw and attach it to the back.
- Inflate the balloon and release it.
Why it works: As air rushes out the back, it pushes the car forward, a direct demonstration of every action having an opposite reaction.
7. Egg Drop Challenge
A classic engineering test that suits a wide age range and scales in difficulty.
You’ll need: raw eggs, assorted padding materials (cotton balls, bubble wrap, straws, tape), a container
Steps:
- Have kids design a protective case for the egg.
- Drop the container from a set height, such as a stairwell.
- Check whether the egg survived and discuss what worked.
Why it works: Padding absorbs and spreads out the force of impact, slowing the egg’s deceleration.
8. Static Electricity Butterfly
A quiet, low-mess option that’s perfect for a smaller space.
You’ll need: tissue paper, a balloon, wool fabric or hair
Steps:
- Cut tissue paper into butterfly or confetti shapes.
- Rub the balloon against wool or hair for 20 seconds.
- Hold the balloon near the paper and watch it jump.
Why it works: Rubbing the balloon transfers electrons, giving it a charge that attracts the lighter paper.
9. Homemade Lava Lamp
This one blends chemistry and physics into a visual kids will want to repeat again and again.
You’ll need: a clear bottle, vegetable oil, water, food coloring, Alka-Seltzer tablets
Steps:
- Fill the bottle a quarter full with water, then top with oil.
- Add a few drops of food coloring.
- Drop in a piece of Alka-Seltzer and watch the bubbles rise and fall.
Why it works: Oil and water don’t mix due to density and polarity differences. The tablet releases carbon dioxide bubbles that carry colored water up before it sinks back down.
10. Walking Water Rainbow
A gentle demonstration of capillary action that unfolds slowly and builds patience.
You’ll need: clear cups, water, food coloring, paper towels
Steps:
- Arrange cups in a row, alternating full and empty.
- Fold paper towels, placing one end in a full cup and the other in an empty one.
- Watch colored water travel across the towels over several hours.
Why it works: Paper towel fibers pull water upward through capillary action, the same process that helps plants draw water from soil.
Water and Sensory Science
Water-based projects are some of the most forgiving science experiments for kids because cleanup is usually just a towel away.
11. Sink or Float Sorting
An easy entry point for the youngest scientists in the house.
You’ll need: a large bowl or bin of water, various household objects (coin, cork, apple, spoon, sponge)
Steps:
- Ask kids to predict whether each object will sink or float.
- Drop items in one at a time.
- Sort them into “sink” and “float” groups.
Why it works: Objects float when they’re less dense than water and sink when they’re denser, regardless of size alone.
12. Dancing Raisins
A tiny setup produces a surprisingly entertaining show.
You’ll need: a clear glass, clear soda water, raisins
Steps:
- Fill the glass with soda water.
- Drop in a handful of raisins.
- Watch them rise and sink repeatedly.
Why it works: Carbon dioxide bubbles cling to the wrinkled raisin surface and lift it up, then pop at the top so the raisin sinks and the cycle repeats.
13. Naked Egg (Vinegar Dissolves Shell)
A slower experiment that rewards a few days of patience with a strange result.
You’ll need: a raw egg, a jar, vinegar
Steps:
- Submerge the egg completely in vinegar.
- Leave it for 24 to 48 hours, changing the vinegar once if needed.
- Rinse gently to reveal a rubbery, shell-less egg you can bounce lightly.
Why it works: Vinegar’s acid dissolves the eggshell’s calcium carbonate, leaving only the flexible membrane.
14. Water Density Tower
A striking way to show that not all liquids are created equal.
You’ll need: honey, dish soap, water, vegetable oil, rubbing alcohol (colored), a tall clear glass
Steps:
- Pour each liquid slowly into the glass, starting with the heaviest (honey) and ending with the lightest (alcohol).
- Pour down the side of the glass to avoid mixing.
- Observe the distinct layers.
Why it works: Liquids of different densities settle into layers based on how tightly their molecules are packed.
15. Ice Excavation
A frozen treasure hunt combining patience, temperature science, and problem-solving.
You’ll need: small toys, a container, water, salt, warm water, tools like spoons or droppers
Steps:
- Freeze small toys inside a container of water overnight.
- Pop out the ice block and let kids use warm water, salt, and tools to melt it.
- Compare which methods worked fastest.
Why it works: Salt lowers water’s freezing point, speeding up melting, while warm water transfers heat directly into the ice.
Outdoor and Nature Experiments
These activities take the lab outside and connect directly to the natural world, well suited for school-age kids studying plants, weather, or ecosystems.
16. Plant Growth in Different Light
A slow-building project that teaches observation and basic biology.
You’ll need: two identical seedlings or bean seeds, pots, soil, water
Steps:
- Place one pot in a sunny window and the other in a dark closet.
- Water both equally on the same schedule.
- Track growth over one to two weeks.
Why it works: Plants use light for photosynthesis to produce energy, so the plant kept in darkness will grow slower, paler, or not at all.
17. Homemade Sundial
A hands-on look at how ancient civilizations tracked time using shadows.
You’ll need: a stick or pencil, a paper plate or cardboard circle, a sunny spot
Steps:
- Push the stick through the center of the plate and set it outside.
- Mark where the shadow falls every hour, noting the time.
- Use the marks to tell time the next day.
Why it works: As Earth rotates, the sun’s position shifts, changing the shadow’s direction and length throughout the day.
18. Cloud in a Jar
This one feels like weather magic brought indoors, best done with adult supervision near hot water.
You’ll need: a glass jar, hot water, ice, hairspray or a match (adult-supervised)
Steps:
- Pour a little hot water into the jar and swirl it around.
- Place a lid with ice on top for about 20 seconds.
- Quickly lift the lid, spray a bit of hairspray inside, replace the lid, and watch a cloud form.
Why it works: Warm, moist air rises and cools against the cold lid, and particles from the spray give water vapor something to condense around, just like real clouds forming around dust.
19. Leaf Chromatography
A colorful way to reveal the hidden pigments inside leaves.
You’ll need: green leaves, rubbing alcohol, a coffee filter, a jar, a coin
Steps:
- Crush leaves with a coin onto a strip of coffee filter to press out pigment.
- Stand the strip in a jar with a little rubbing alcohol, pigment line above the liquid.
- Wait 30 to 60 minutes as the alcohol separates the colors.
Why it works: Chlorophyll gives leaves their green color but masks other pigments like yellow and orange, which chromatography separates based on how each dissolves and travels through the paper.
20. Rain Gauge and Weather Tracking
A simple project that turns everyday weather into a data-collecting habit.
You’ll need: a clear plastic bottle, scissors, a ruler, tape, a notebook
Steps:
- Cut the top off the bottle and invert it into the base as a funnel, then tape in place.
- Mark measurement lines on the outside with a ruler.
- Set it outside and record rainfall after each storm.
Why it works: Measuring rainfall over time introduces kids to basic data collection, a core skill in real meteorology.
A Few Tips Before You Begin
- Keep an “experiment box” stocked with baking soda, vinegar, food coloring, and balloons.
- Cover the table before anything involving liquids or slime.
- Let kids predict the outcome before each experiment. Guessing builds curiosity and makes the result more memorable.
- Save messier projects, like the density tower or lava lamp, for unhurried days.
- Treat any experiment involving heat, glass, or sharp tools as adult-assisted rather than solo.
These projects prove that hands-on learning rarely requires anything more exotic than what’s already in the kitchen or backyard. Whether it’s a fizzing volcano, a homemade lava lamp, or a quiet afternoon watching water climb a paper towel, each activity turns ordinary curiosity into a real lesson about chemistry, physics, or the natural world. Start with one or two that match your child’s age and patience level, then build from there. The goal isn’t a perfect result every time, it’s the habit of asking “what if” and testing the answer together.
Also Read:
Math Riddles for Kids
Animal Trivia Questions for Kids
Science Trivia for Kids With Answers